The frustrating 10-yard distance loss on a coastal course isn’t a mystery; it’s the predictable physics of the marine layer, and you can master it.
- Heavy, moist morning air is denser than dry inland air, creating more drag on the ball and reducing carry distance by up to 10%.
- Coastal green behavior is dictated by agronomy; Poa annua grass grows aggressively in the afternoon, making putts bumpier and less predictable.
- A proactive strategy involves selecting tee times to avoid the thickest fog, layering clothing correctly, and executing specific shots to cut through the heavy air.
Recommendation: Stop fighting the coastal environment and start treating it as a solvable variable. By understanding the science, you can plan your shots, protect your equipment, and turn a challenge into a strategic advantage.
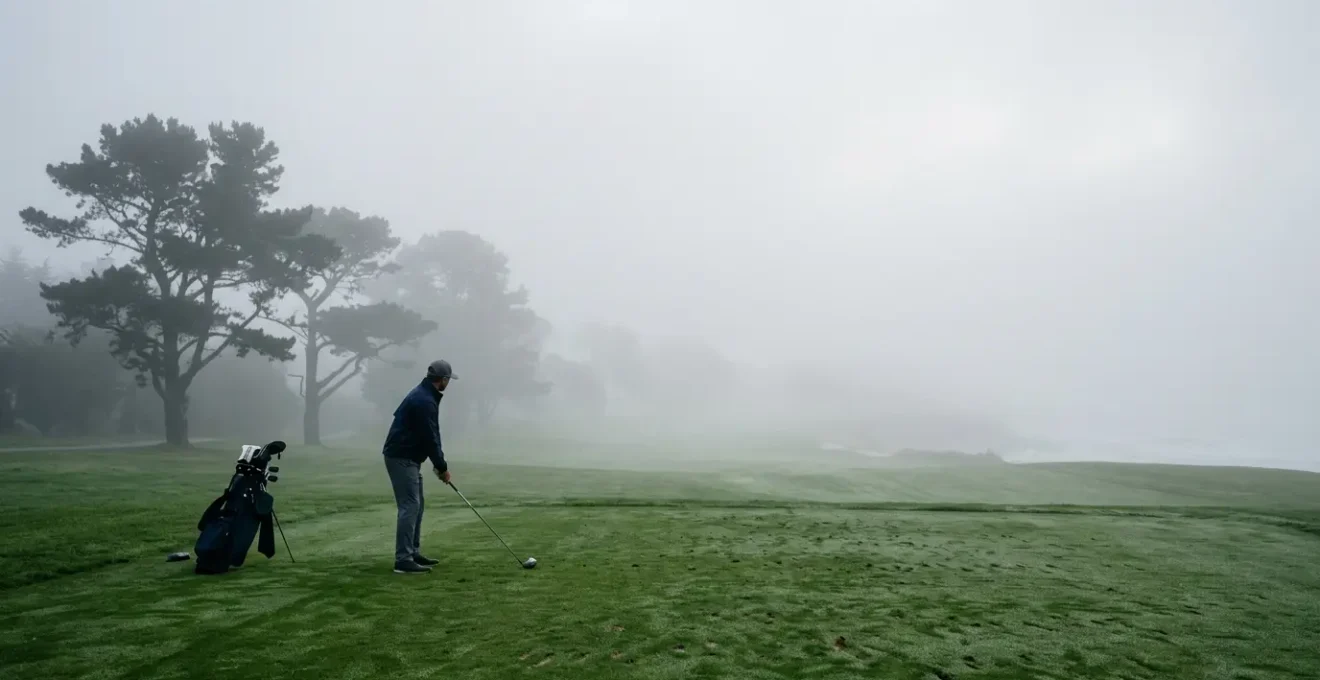
You stand on the first tee of a legendary coastal course, a bucket-list destination. You stripe a 7-iron that, on your home track, would be flag-high. You watch it climb, hang in the thick, grey air, and then fall unceremoniously into the front bunker, a full club short. For the first-time coastal golfer, this experience is baffling and deeply frustrating. The common advice is simply to « club up, » but this is a reactive guess, not a strategy. Many players blame the wind or just accept it as an unknowable coastal quirk, never truly understanding the forces at play.
The truth is far more scientific and, therefore, more predictable. The key isn’t to fight the « heavy air » but to understand its meteorological origins. The phenomenon responsible for your distance loss is the marine layer, a dense, cool, and moisture-laden mass of air that forms over the ocean. This isn’t just fog; it’s a specific atmospheric condition with measurable effects on ball flight, turf interaction, and even equipment longevity. It’s a micro-climate that demands a different approach to the game, one rooted in meteorology and physics.
But if the real answer isn’t just « take more club, » what is the solution? It lies in shifting your mindset from a reactive player to a proactive strategist. It’s about learning to read the environment—the air density, the angle of the sun on the grass, the subtle signs of corrosive salt—and making calculated adjustments. This guide will move beyond the platitudes and decode the science of coastal golf. We will explore why your ball flies shorter, how the grass behaves differently by the sea, and the specific techniques and planning required to conquer these unique conditions.
By the end of this article, you will have a complete strategic framework for your next coastal round. From selecting the right club to preserving your irons and even planning the trip itself, you’ll learn to see the marine layer not as an obstacle, but as a puzzle you are uniquely equipped to solve. Let’s dive into the science behind the shots.
Summary: A Strategic Framework for Mastering Coastal Golf
- Why Does the Ball Fly 10% Shorter at Sea Level in the Morning?
- How to Determine the Direction of the Ocean for Putting Breaks?
- Poa Annua or Bermuda: Which Grass Gets Bumpier in the Afternoon?
- The Maintenance Mistake: Leaving Salt Air on Your Forged Irons
- When to Tee Off to Avoid the Heaviest Morning Marine Layer?
- The Weather Mistake: Assuming Sunshine in July on the Monterey Peninsula
- How to Stabilize Your Hands to Zap the Flagstick Past 150 Yards?
- How to Plan a Multi-Year Savings Strategy for a Bucket List Trip?
Why Does the Ball Fly 10% Shorter at Sea Level in the Morning?
The primary reason your golf ball seems to hit a wall in coastal air is a simple matter of physics: increased air density. A golf ball’s flight is a battle between its initial velocity and the resistance of the air it travels through. On a cool, humid morning at sea level, the air is significantly denser, creating more drag. This density is a product of three key factors: temperature, elevation, and humidity. Cool air is denser than warm air; air at sea level is denser than air at altitude; and humid air (where water vapor replaces lighter nitrogen molecules) is actually less dense, but this effect is often dwarfed by the dominant impacts of low temperature and low altitude.
For every 20°F drop in temperature, a golfer can expect a significant distance loss. Performance research confirms a 1.5% distance loss for every 20°F decrease, meaning a 280-yard drive at 80°F becomes a 274-yard drive at 60°F. Now, combine this with the elevation factor. Detailed research on air density and ball flight shows a distance gain of about 1.1-1.2% for every 1,000 feet of elevation. Playing at sea level, therefore, represents the baseline with maximum air resistance. When you tee off on the Monterey Peninsula at 8:00 AM, the temperature might be 55°F at sea level. The combined effect of cold and dense air can easily sap 8-10% of your carry distance compared to playing on a warm afternoon at an inland course 2,000 feet above sea level.
This concept is best visualized at a micro level. The dense, moisture-laden air of the marine layer creates a more viscous medium for the ball to travel through, as if it’s flying through a subtly thicker atmosphere.
As the illustration shows, tiny water droplets cling to the ball, representing the moisture content of the air. Each dimple must work harder to create the aerodynamic lift required for a long, high ball flight. The result is a lower, shorter trajectory with less carry. The solution is not just to swing harder—which often increases spin and makes the ball balloon—but to make a calculated adjustment, often taking one to two extra clubs for approach shots.
How to Determine the Direction of the Ocean for Putting Breaks?
A long-standing coastal golf adage states that « all putts break toward the ocean. » While this is a useful generalization, it’s an oversimplification. The break of a putt is influenced by two forces: topography (the slope) and grain (the direction the grass grows). On many coastal courses, the land naturally slopes toward the sea, making it the dominant factor. However, the grain, which is heavily influenced by the sun and prevailing wind, can sometimes override or exaggerate the topographical break. Mastering coastal greens requires you to differentiate between these two forces.
The grain on coastal greens typically grows in two primary directions: towards the setting sun (west) and with the direction of the prevailing wind, which often comes off the ocean. This creates a complex matrix of forces. If the ocean is to your west, both factors work in unison, creating a powerful pull. But what if the ocean is to the north and the sun sets in the west? The grain might be growing perpendicular to the main slope, creating a confusing cross-break. The key is to learn to read the grain independently of the slope.
You can identify the direction of the grain by observing the color and sheen of the grass. A simple pre-round routine on the practice green can help you calibrate your eyes:
- Observe from all sides: Look at the green from different angles. When you are looking downgrain (with the direction of growth), the grass will appear shiny, glossy, or silvery. Putts on this line will be significantly faster.
- Identify the ‘into-the-grain’ look: When you look into the grain (against the direction of growth), the grass will appear dark, dull, and almost matte. Putts into the grain will be much slower and will hold their line more firmly.
- Feel the difference: Hit a few short putts from various directions. Pay close attention to the difference in speed and break between a shiny putt and a dull-looking putt of the same length and slope. This calibrates your feel for the day.
On the course, before you even look at the slope, determine the grain direction. Is your putt shiny or dull? Then, assess the topographical break. The true break of the putt will be the net result of these two forces. Sometimes they cancel each other out, leading to a surprisingly straight putt on a sloping green. Other times, they compound, creating a massive break that seems to defy logic.
Poa Annua or Bermuda: Which Grass Gets Bumpier in the Afternoon?
The type of grass on the greens plays a massive role in your coastal golf experience, especially as the day wears on. While many modern courses use resilient Bermuda or Bentgrass, the classic coastal courses, particularly on the U.S. West Coast, are famous for their Poa annua greens. Poa annua, or annual bluegrass, is a species that thrives in cool, moist climates. It produces beautiful, smooth putting surfaces in the morning, but its agronomic behavior creates a significant challenge in the afternoon: it gets bumpy.
The reason for this change is rooted in the plant’s biology. Poa annua is known for its prolific seed head production, especially during the day. After a fresh morning mow, the greens are pristine. However, as the day progresses and the sun encourages growth, the plant produces tiny seed heads. This rapid growth cycle means that a green that was perfectly smooth at 8:00 AM can become noticeably mottled and bumpy by 3:00 PM. As the blades of grass grow at different rates throughout the day, the surface becomes less uniform.
This afternoon bumpiness has a direct, measurable impact on putting performance. A putt that is perfectly struck can be knocked slightly offline by an errant seed head or an uneven patch of growth. This is particularly true for putts inside 10 feet, where a pure roll is critical. An analysis of over 9,000 PGA Tour rounds on Poa greens reveals that the make rate from 5-10 feet drops significantly for players with later tee times compared to those who play in the morning. This isn’t because the players are worse; it’s because the surface has become objectively more difficult.
In contrast, grasses like Bermuda tend to be more resilient and consistent throughout the day. Bermuda is a warm-season grass that grows laterally via runners, creating a denser, more tightly-knit surface that is less prone to the rapid vertical growth and seed head issues of Poa. When playing a coastal course, identifying the grass type is a key piece of strategic information. If you’re on Poa annua, you must be mentally prepared for putts to wobble a bit in the afternoon. The strategic response is to use a firmer, more aggressive putting stroke to minimize the impact of the bumps and ensure the ball gets to the hole.
The Maintenance Mistake: Leaving Salt Air on Your Forged Irons
The same marine layer that affects your ball flight is also waging a quiet war on your golf equipment. The air in coastal regions is laden with microscopic salt and moisture particulates. While playing, this corrosive aerosol settles on every surface, including your clubheads, shafts, and bag. Forged carbon steel irons, prized for their soft feel, are particularly vulnerable. Leaving this salty residue on your clubs after a round is a critical maintenance error that can lead to accelerated oxidation and rust, permanently damaging the finish and value of your investment.
The corrosive process is simple chemistry. Salt (sodium chloride) acts as an electrolyte, speeding up the electrochemical reaction that causes iron to rust when exposed to oxygen and water. The fine mist of the marine layer ensures all three ingredients are present. A small pit of surface rust can form in as little as 24-48 hours if a club is put away wet and salty. While stainless steel clubs offer more resistance, they are not immune, and even the chrome plating on forged irons can be compromised over time, allowing rust to form underneath.
This isn’t just an aesthetic issue. Rust on the clubface can alter spin characteristics and feel, while rust near the hosel can compromise the club’s structural integrity over the long term. Therefore, a rigorous post-round cleaning protocol is not optional; it’s an essential part of your coastal golf strategy. This simple audit will protect your equipment and ensure it performs as designed for years to come.
Action Plan: Post-Coastal Round Equipment Decontamination
- Immediate Rinse: As soon as possible after the round, rinse all clubheads with fresh water. This is the single most important step to remove the bulk of the salt residue.
- Detailed Scrub: Use a stiff-bristled brush and mild soap to thoroughly scrub the grooves and face of each iron and wedge. This eliminates embedded sand and stubborn salt particles.
- Thorough Dry: Dry every part of the club completely with a clean, dry microfiber towel. Pay special attention to the hosel, the back cavity, and any engravings where moisture can hide.
- Protective Coating: Apply a light protective barrier. A quick wipe with a silicone-impregnated cloth or a very light spray of a marine-grade corrosion inhibitor like WD-40 on the clubheads provides an effective shield against any remaining moisture.
- Full Bag Inspection: Extend your audit beyond the clubs. Check bag zippers, push cart frames, and metal buckles for salt buildup and lubricate or clean them as needed to prevent seizure and corrosion.
When to Tee Off to Avoid the Heaviest Morning Marine Layer?
Choosing your tee time on a coastal course is a major strategic decision that goes far beyond simply picking a convenient slot. It directly impacts your experience with the marine layer. While an early morning tee time might seem appealing, it often means playing the first several holes in the thickest, coldest, and most distance-sapping conditions of the day. Understanding the typical « burn-off » cycle of the marine layer is key to optimizing your round.
The marine layer is typically at its peak strength and thickness just before sunrise. As the sun rises and begins to heat the land, the air temperature at the surface increases. This warming process « burns off » the fog from the ground up, causing the base of the marine layer to lift and eventually dissipate. This is not an instantaneous process; it can take several hours. Therefore, a golfer with a 7:30 AM tee time might play the entire front nine in dense fog and 55°F temperatures, while a player teeing off at 11:00 AM may start in light fog that gives way to brilliant sunshine by the fourth hole.
On iconic coastlines like the Monterey Peninsula, this pattern is highly predictable. An analysis of seasonal weather patterns at Pebble Beach show that morning fog typically burns off by afternoon, with the sun often breaking through around noon. The strategic trade-off is clear: an early time may offer a faster pace of play and pristine greens, but it comes at the cost of tougher playing conditions. A late-morning or early-afternoon tee time generally provides better weather, warmer temperatures, and longer ball flight, but you’ll be playing on Poa annua greens that are bumpier.
The ideal tee time window is often between 10:00 AM and 12:00 PM. This timing allows you to miss the worst of the morning chill and fog, while still getting to play a significant portion of your round before the afternoon winds pick up and the Poa greens get too bumpy. It’s a calculated compromise to balance the competing environmental factors.
Ultimately, the choice depends on your priorities. Do you value smooth greens above all else? Go early and prepare for a battle with the elements. Do you prefer warmer weather and longer drives? Tee off later and be ready for a more aggressive putting strategy. There is no single « best » time, only the time that is best for your game and preferences.
The Weather Mistake: Assuming Sunshine in July on the Monterey Peninsula
One of the biggest misconceptions for golfers planning a summer trip to the Pacific coast is equating « summer » with « sunshine. » In reality, the peak of summer—June, July, and August—is often the foggiest time of year in places like Pebble Beach or Bandon Dunes. This phenomenon has earned local nicknames that perfectly capture the experience. As one authoritative guide puts it:
Welcome to ‘June Gloom’ and ‘Fogust.’ A persistent marine layer is the hallmark of a Pebble Beach summer. Mornings often start out completely socked in with thick, cool fog.
– Pebble Beach Golf Guide, Best Time of Year to Play Golf at Pebble Beach
This counter-intuitive weather pattern is caused by a temperature inversion. In the summer, the inland valleys of California heat up intensely. This hot, rising air pulls the cool, moist marine layer from the ocean further inland, creating a thick, stable blanket of fog along the coast. The temperature difference between a coastal town and a location just 20 miles inland can be a staggering 30-40°F. Tourists arrive in shorts and t-shirts, only to find themselves shivering and buying expensive pro shop sweatshirts.
The strategic mistake is packing for a typical summer vacation instead of for a multi-season meteorological event. A round of golf on the Monterey Peninsula in July can start at 55°F in thick fog, transition to 65°F with a light breeze and sun by midday, and finish with a stiff, cool wind in the late afternoon. Proper attire is not about warmth alone; it is about versatile, technical layering.
A professional approach to dressing for coastal golf involves a three-layer system that allows for constant adjustment throughout the round. Every piece should be in your bag, ready to be added or removed as the micro-climate shifts.
- Layer 1 (Base Layer): A moisture-wicking, non-cotton shirt is essential. It pulls perspiration away from your skin, keeping you dry and maintaining your core temperature even in damp, foggy conditions.
- Layer 2 (Mid Layer): A lightweight quarter-zip pullover or a fleece vest provides core warmth without restricting your golf swing. This is the most frequently adjusted layer.
- Layer 3 (Outer Shell): A high-quality wind and water-resistant jacket is non-negotiable. It protects you from the chilling effect of the wind and any light drizzle that might accompany the marine layer.
Forgetting this system is a rookie error. The prepared golfer embraces the « June Gloom » as part of the authentic coastal experience, confident that they have the right gear to stay comfortable and focused, no matter what the marine layer decides to do.
How to Stabilize Your Hands to Zap the Flagstick Past 150 Yards?
Playing into a coastal headwind or through the heavy, dense air of a morning marine layer requires more than just taking extra club. It requires a different type of golf shot. The standard, high-arcing iron shot that works so well inland will get eaten alive by the resistance, ballooning up and falling well short. The solution is the knockdown shot, a controlled, lower-trajectory ball flight designed to penetrate through the air with minimal spin. Mastering this shot is the key to accurate iron play from 150 yards and beyond in coastal conditions.
The goal of a knockdown is to reduce dynamic loft at impact and launch the ball on a lower, more piercing trajectory. This is achieved by quieting the hands and wrists during the swing and relying on body rotation to power the club. An over-active hand release adds spin and loft, which are the enemies of control in heavy air. A stable, passive hand action is paramount. The impulse to swing harder to compensate for the conditions must be resisted; the knockdown is a finesse shot, not a power shot.
Executing the perfect knockdown involves a series of small but critical setup and swing adjustments. This is not a radical swing change, but a repeatable technique that can be added to your arsenal.
- Club Up: The foundation of the shot is to take at least one, and sometimes two, more clubs than the standard yardage. For a 150-yard shot, you might select a 6-iron or even a 5-iron instead of your usual 7-iron.
- Ball Back: Move the ball position slightly back in your stance, about one to two inches from the center. This promotes a steeper, descending angle of attack, which helps de-loft the club at impact.
- Grip Down: Choke down on the grip by about an inch. This shortens the effective length of the club, providing more control and further reducing the shot’s height.
- Abbreviate the Swing: Make a controlled, three-quarter length backswing. The focus should be on a smooth, wide turn of the body, not a long, loose arm swing. Keep your wrists firm.
- Control the Finish: The follow-through is also abbreviated. Finish with your hands low and left (for a right-handed golfer), feeling as though you are holding the club off against the wind. This « punch » finish ensures a low, penetrating flight.
The mental key is to trust the extra club. Commit to a smooth, 80% effort swing and let the reduced loft and controlled action do the work. When you see your ball flying on a tight, boring trajectory straight at the flag while others are watching their shots fall out of the sky, you’ll know you’ve unlocked a crucial secret to coastal golf.
Key Takeaways
- Coastal air density, a function of low temperature and sea level, is the scientific reason for distance loss; plan for up to 10% less carry.
- Afternoon bumpiness on Poa annua greens is a predictable agronomic event; use a firmer putting stroke to compensate.
- A proactive strategy—including smart tee times, layered clothing, and specialized shots like the knockdown—is superior to simple reactive adjustments.
How to Plan a Multi-Year Savings Strategy for a Bucket List Trip?
A golf trip to a world-class coastal destination like Pebble Beach is more than a vacation; it’s a significant financial investment. The sticker shock can be substantial, with green fees, mandatory caddie fees, and on-site lodging quickly adding up to thousands of dollars. Rather than seeing this as an insurmountable barrier, the strategic golfer treats it as a long-term goal that requires a dedicated financial plan. A multi-year savings strategy turns a lofty dream into an achievable reality.
The first step in any savings plan is to understand the total cost. Researching the expenses for your target destination is critical. Costs can vary significantly between peak season and the « shoulder » seasons, which often provide better value and, in many cases, better weather. Breaking down the major expense categories provides a clear savings target.
This comparative analysis of trip costs highlights the financial benefits of strategic timing. Playing in the shoulder season can save over $1,000 on a short trip.
| Expense Category | Peak Season (Summer) | Shoulder Season (April-May, Oct-Nov) |
|---|---|---|
| Green Fee (Pebble Beach) | $600-$675 | $550-$625 |
| Mandatory Caddie Fee + Tip | $125-$150 | $125-$150 |
| On-site Lodging (per night) | $800-$1,200 | $500-$800 |
| Dining & Incidentals (per day) | $150-$250 | $120-$200 |
| Total 3-Day Trip (est.) | $3,500-$5,000 | $2,500-$3,800 |
Once you have a target number—say, $4,000 for a trip in three years—the path becomes mathematical. The most effective method is to create a dedicated « sinking fund. » This involves setting up a separate savings account, automating contributions, and tracking your progress. This approach removes the emotional friction of saving and turns it into a consistent, background process.
The process is simple and powerful:
- Isolate the Fund: Open a new high-yield savings account and label it with your specific goal, such as « Pebble Beach 2027. » This psychological separation is crucial.
- Calculate the Rate: Divide your total estimated cost by the number of months until your trip. A $4,000 trip in 36 months requires a monthly saving of approximately $112.
- Automate the Contribution: Set up an automatic transfer from your primary checking account to your golf fund for that amount every payday. Automation is the key to consistency.
- Accelerate with Windfalls: Direct any unexpected income—work bonuses, tax refunds, cash gifts—directly into this fund to reach your goal faster or upgrade your trip.
- Visualize the Goal: Track your progress with a chart or app. Seeing the balance grow from 25% to 50% to 75% funded provides powerful motivation to stay the course.
By applying the same strategic mindset to your finances as you do to your course management, the trip of a lifetime moves from a vague wish to a scheduled event on your calendar. Start planning today to transform your bucket list into a well-deserved reality.